VIOLIN BASICS
PARTS OF THE VIOLIN
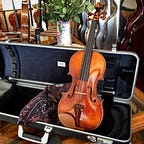
The picture below illustrates the parts of the violin. You can look at it to master all the parts: The Pegbox, Scroll, Peg, Neck, Fingerboard, Strings — G — D — A — E, F-Hole, Bridge, Fine Tuners, Tailpiece, Chinrest, Upper bout, Waist, Lower Bout, F-Hole, Fine Tuners.
Let’s now look at each of these parts.
The Peg
The pegs are used to tune the violin. The fine tuners located at the tailpiece are the easiest way to change string pitch to tune violin for the absolute beginner.
Fingerboard and the Bridge
The fingerboard is important for the left hand because finger placement determines pitch on the 4 strings which are G, D, A, and E.
The area between the fingerboard and bridge is where the bow is used and it’s the aim of the beginner to bow parallel to the bridge while avoiding the fingerboard.
Chin Rest
The chin rest is as the name suggests, the place to rest the head and chin comfortably while balancing and playing the violin.
Rosin
Rosin — It is applied on the violin bow hairs to create friction as the violin is played. Without rosin to the bow, the violin won’t make a sound! In fact, the bow will slip on the strings. Rosin has a tacky feel, causing the bow hair stick to the string. As the bow is moved across the string, this ‘sticking’ causes the violin to vibrate.
PARTS OF THE BOW
The picture below shows the parts of the bow. These parts include Tip, Screw, Frog, Bow Hair, Grip.
How to hold the Bow
I have attached videos to this document to help learn how to hold the bow. Make sure you follow all the steps in the videos to help you master it. After watching the videos, you should be able to make your own pinkie holder help keep your right-hand pinkie round and in the right shape. The correct bow hold will allow the violinist to make the bow stroke efficiently. Getting the correct bow hold is unavoidable for all violinists.
Here is the video on how to make a pinkie holder for your bow
The above pictures demonstrate how the bow should be held. Below are more attached videos that will help you learn how to hold the bow.
How to hold the violin.
I have attached videos to this document to help you know how to hold the violin correctly. Ensure that the students practice every day that they may master how the violin is held correctly. Do it as many times as possible without giving up until you get the posture right both for the violin and the left-hand position.
After you have mastered the correct violin hold and your left hand is correct and straight on the violin neck, place the 1st,2nd, and 3rd fingers on String A.
Use the video below o strengthen your left fingers on the fingerboard and to improve your muscle memory for the first position finger placements. Practice this as many times as possible for mastery.
Mark first Position fingering — After you’ve learned how to tune the violin, you need to now dive in and learn how to mark first position fingering on the fingerboard. Use the video below to mark the fingering of the first position.
How to tune the violin — If the violinist is still a beginner, the teacher must ensure that you have taken the violinist through the steps to tuning the violin. You should take them through the steps of tuning the violin each time you have a class. Guiding them on how to tune the violin will help to develop the good ear and muscle memory required to play the notes accurately. Use the attached link to get all the steps they will use to tune the violin. Ensure that they have downloaded DA tuners from the apps store, which will be used to tune the violin. Train them on how to use the app efficiently in the tuning of the violin. They must ensure to counter check all the finger markings with the online chromatic tuner to ensure that all markings are placed accurately on the fingerboard. Use the video below for the tuning of the violin.
You can alternatively use the online chromatic tuner to tune the violin. It works like the DA tuner. If the student is not able to get a DA tuner, they should click on the link below to access an online chromatic tuner.
Use the attached document to elaborate to them the locations of the notes on the fingerboard for the first position notes. The fingering chart will help them know the correct fingering on first positions, how they flow, and the location of notes on the first position. Take note that every scale has its own fingering positions’ order on the fingerboard. The chart below has stated the fingering positions for all the major scales on the violin. The student should master the fingering notations on the fingerboard of the specific scale before playing. For example, they should master the fingering of the scale of D Major before playing a music sheet in D Major of a Song that is on that particular scale. Find attached fingering document attached below.
The staff- Use the document in the drive for mastery of all the notes on the music staff. A link is attached here for staff notes practice
Musical Rhythms
The chart below states the rhythms in music. There are different types of rhythms.
Use the links below to get a deeper understanding of the rhythms.
The Pie chart game and practice links are attached for mastery of all those rhythms. All students must master all the rhythms before proceeding to the next steps.
Bowing Exercises
Before they start working on the bowing exercises. I would like the teachers to take the violinists through pizzicato exercises that will help them in mastering the notes on the first position starting with open stings. Check Tune A Day — page 11. They should pluck as they mention the note they are playing. Below is an attached video that elaborates on how to play pizzicato on the violin.
For bowing exercises the students are required to play the scale of G Major Lower Octave and D Major, each time you have a class until all have mastered the correct bowing technique. Ensure they play full bow for all the scale notations.
Later, they are required to Use The pieces on Tune a day for bowing exercises. Make sure they play full bow for all the notes you’ll be playing to get a feel of the bow — Tune A Day — Pages 12–16.
They should now proceed to their First Sight reading attempt — Nothing But The Blood of Jesus
After they have mastered the bowing skills, they should now proceed to Suzuki book 1, where they will have to read the music sheet as they play. The students’ eyes should be glued to the music sheet as they play each time they are reading music. Consistency in sight-reading will improve their rhythms and sight-reading skills. They should sightread anytime they practice Suzuki Book 1 Pieces.
All the students are required to play all the pieces in Suzuki Book 1 with the accompaniment and submit audios to their teachers. The students have their marking schemes on youtube. They are allowed to counter check with the correct video on youtube before submitting it to their teachers.
The students should play the pieces of Suzuki Book 1 in this order:
- Twinkle Twinkle — Variation A, Variation C, Variation D, Theme.
- Lightly Row, Song of the Wind, Go Tell Aunt Rhody, O Come Little Children
- May Song, Long Long Ago, Allegro, Perpetual A Major
- Andantino, Perpetual D Major, Allegretto, Etude
- Minuet 1, Minuet 2, Minuet 3, Happy Farmer, Gavotte
- Major Scales, Sequences, Arpeggios, Minor Scales
Once a team has completed Book 1, they will be given an instrumental to attempt as a team. The students will be given Major Scales, Minor Scales, Sequences, and Arpeggios to attempt and submit the audios to their teachers. I have attached a link you’ll use to take them through minor scales.
The scales and arpeggios should be done in this order:
- A major, A major slurred, A Minor melodic, A Minor Harmonic
- C major slurred, D major, D major slurred, D Minor melodic, D Minor Harmonic
- E Major slurred, E Minor melodic, E Minor Harmonic
- F Major slurred, G Minor Melodic, G Minor Harmonic
- G Major Two Octaves, G Major Two Octaves Slurred, G Minor Melodic, G Minor Harmonic
- Ab Major slurred, G# Minor melodic, G# Minor harmonic
- A Major slurred, A Minor melodic, A Minor harmonic
- Bb Major (G3, G4), Bb Minor melodic, Bb minor harmonic
DON’TS FOR ALL BEGINNERS.
The process of learning violin involves precise execution of the correct violin playing habits and solidifying these habits by ensuring that you practice that regularly. I am going to mention common mistakes and problems violinists face as they develop the correct habits in violin playing. The knowledge of these common problems will help you deliver great strides.
- Posture
Developing a correct posture is extremely important for any violinist. Correct posture means perfect arm angle, height, body positions as you play, your head placement as you hold the violin. You must learn the correct posture and incorporate it into your violin playing. The tutor must teach all these principles to the students. Having the wrong posture will always affect your playing, getting the correct posture is completely unavoidable. Ensure you take note of all this negative posture that will be listed below:
- Not sitting straight/ Slouching
- Sinking Titanic- The pointing of the violin towards the ground, creating a lesser counterbalance weight that keeps your shoulders stiff and pointing in front. The shoulder should rest back as you hold the violin.
- Hugging the left elbow and keeping it close to the body.
- Primarily, anything that keeps you frozen will hinder you from getting your posture correctly.
Execution
Execution problems are caused by incorrect posture. It is very key that every teacher ensures that the violinist has mastered the correct posture before playing any notes on the violin. They include:
- Pressing too hard as you play those notes on the fingerboard and lifting the fingers too high.
- When your left wrist touches the lower body of the fingerboard. This will be a great undoing when the students attempt the high positions.
INCORRECT LEFT-HAND POSTURE
CORRECT LEFT-HAND POSTURE
3. Placing your left-hand first finger incorrectly. This will give incorrect notes resulting in intonation issues. The first finger always acts as the anchor for all the other notes. Getting it right is extremely fundamental.
4. Not using the full bow length as you play — From the frog to the tip and back. You must learn to use the bow correctly, 100% of the bow.